- Login as root in CentOS
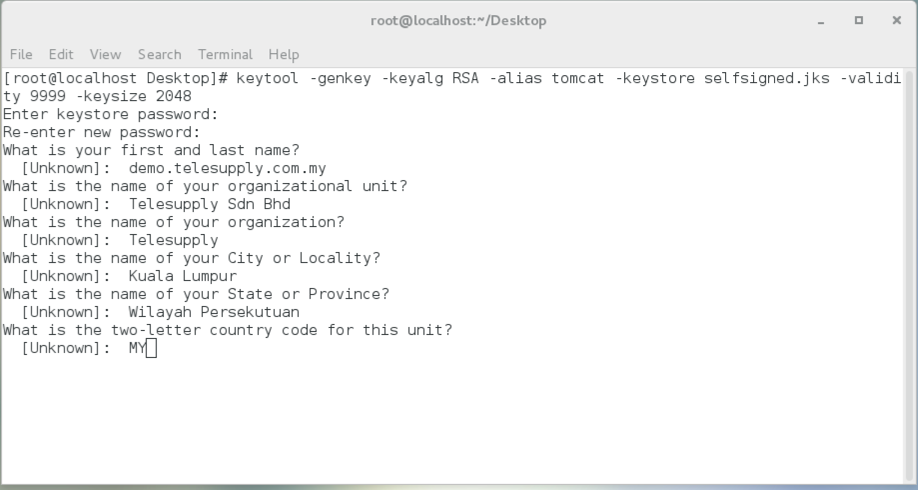
- Open Terminal and run the command below.
- <days> indicate the number of days for which the certificate will be valid.
- selfsigned.jks is the name of the certificate. You can rename to other name, ended with .jks
keytool -genkey -keyalg RSA -alias tomcat -keystore selfsigned.jks -validity <days> -keysize 2048
- Enter the password for keystore. Keep this password as you need it when configure in Tomcat.
- When prompted first name and last name, enter the domain name of the server. For example, myserver.mycompany.com.

- Enter other details, such as Organization Unit, Organization, City, State, and Country.
- Confirm that the information entered is correct.
- Ensure all information entered is correct. Enter Yes.
- When prompted with "Enter key" password for <tomcat>, press Enter to use the same password as the keystore password you created previously.
- Your certification has been created successfully.
- Run this command to verify the contents of the keystore.
keytool -list -v -keystore selfsigned.jks
- When prompted, enter the keystore password. The basic information about the generated certificate is displayed. Verify that the "Owner" and "Issuer" are the same.
- This certificate is now complete and can be used by Apache Tomcat.

